Hugo搭建个人博客
通过本文记录使用Hugo搭建萝卜头的博客。
0. 序言
0.1 本文的目录
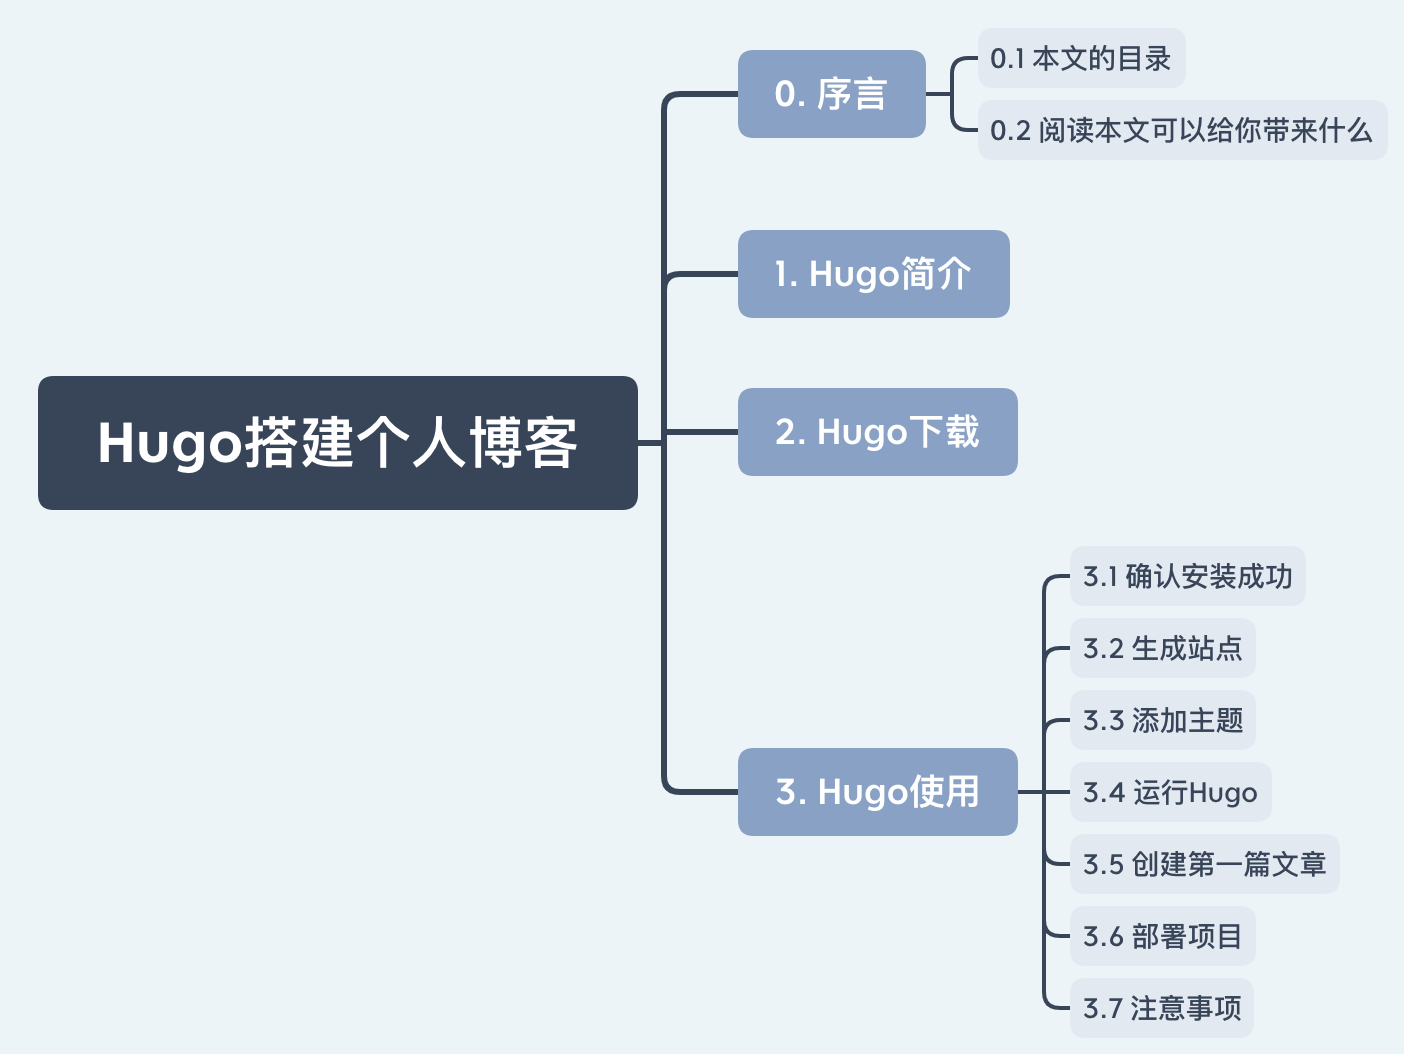
0.2 阅读本文可以给你带来什么
使用Hugo来搭建个人的博客。
1. Hugo简介
Hugo是由Go语言实现的静态网站生成器。
官网介绍:Hugo is one of the most popular open-source static site generators. With its amazing speed and flexibility, Hugo makes building websites fun again.
2. Hugo下载
可以下载二进制包,地址:https://github.com/gohugoio/hugo/releases
也可以查看官网安装说明:https://gohugo.io/getting-started/installing/
3. Hugo使用
3.1 确认安装成功
| |
3.2 生成站点
一个站点的创建命令如下:
| |
例如我需要创建个人的博客名为:myblog
| |
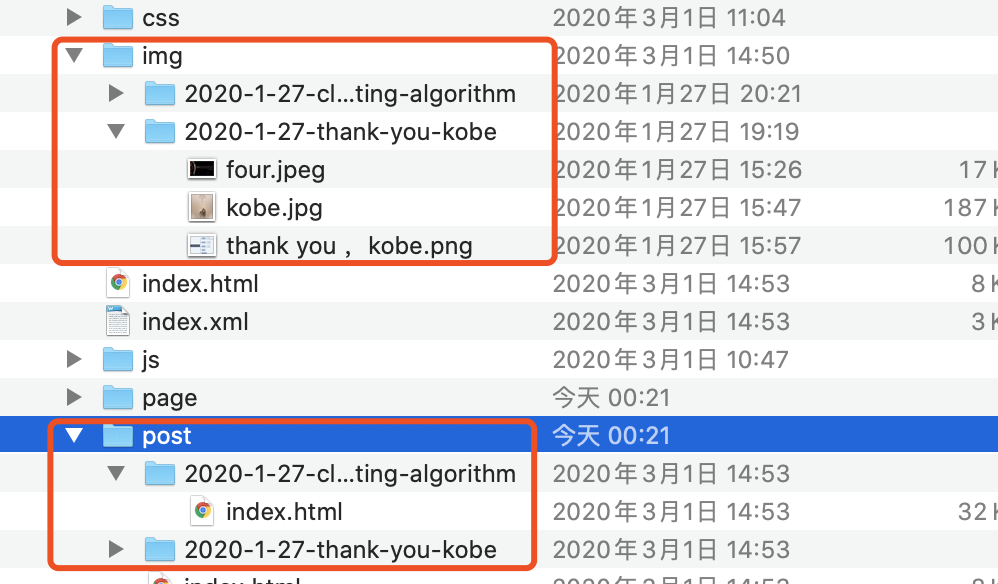
创建完会后,在myblog文件夹会生成以下文件结构:
.
├── archetypes # 存放生成博客的模版
├── config.toml # 存放 hugo 配置文件 支持 JSON YAML TOML 三种格式配置文件
├── content # 存放 markdown 文件
├── data # 存放 Hugo 处理的数据
├── layouts # 存放布局文件
├── static # 存放静态文件 图片 CSS JS文件
└── themes # 存放主题
3.3 添加主题
hugo有很多主题,可以见官网的主题市场:https://themes.gohugo.io/
个人推荐两个比较好的主题:
我的自己个人博客使用的是第一个。
| |
3.4 运行Hugo
在创建的站点目录执行相关命令进行调试:
| |
浏览器打开:http://localhost:1313/
3.5 创建第一篇文章
| |
刷新浏览器会有一篇My First Post的文章。
可以将主题中的config.toml以及content拷贝到站点相对应的目录中(config.toml把站点的同名文件覆盖,主题中content拷贝到站点的content目录下)
| |
3.6 部署项目
| |
会看到站点文件夹下面多了一个public的目录,将public中的内容推到github个人库中例如我的:https://github.com/robotLJW/robotLJW.github.io
3.7 注意事项
一、图片需要使用相对位置
二、config.toml中的baseURL需要使用域名
- 原文作者:萝卜头的博客
- 原文链接:https://robotljw.github.io/post/2020-3-5-hugo-blog/
- 版权声明:本作品采用知识共享署名-非商业性使用-禁止演绎 4.0 国际许可协议进行许可,非商业转载请注明出处(作者,原文链接),商业转载请联系作者获得授权。